Why Is My House Leaking When It Rains? Common Causes and Fast Solutions

January 20, 2026 / Written by: Signature Landscape

January 20, 2026
Written by: Signature Landscape

Key Takeaways

  • 60-90% of roof leaks originate at flashing points; chimneys, valleys, and roof-to-wall intersections are the most common failure locations, usually due to improper installation that violates shingle-fashion lapping principles.
  • Proper grading is your first line of defense; the IRC mandates a minimum 5% slope (6 inches over 10 feet) away from foundations, and 98% of basement water problems trace back to inadequate surface drainage.
  • 76% of building envelope failures occur where windows and doors meet walls; missing sill pan flashing with proper back dams and end dams is the primary culprit, with repair costs ranging from $1,000-$15,000 per window.
  • Prevention costs pennies compared to repair dollars; cleaning gutters twice yearly ($100-200) prevents thousands in fascia rot, foundation damage, and basement flooding, while annual roof inspections catch problems before they become structural failures.
  • Climate change is accelerating leak risks; with 2.5x more billion-dollar disasters per year and extreme rainfall events becoming routine, building envelopes face unprecedented stress requiring resilient design and proactive maintenance.

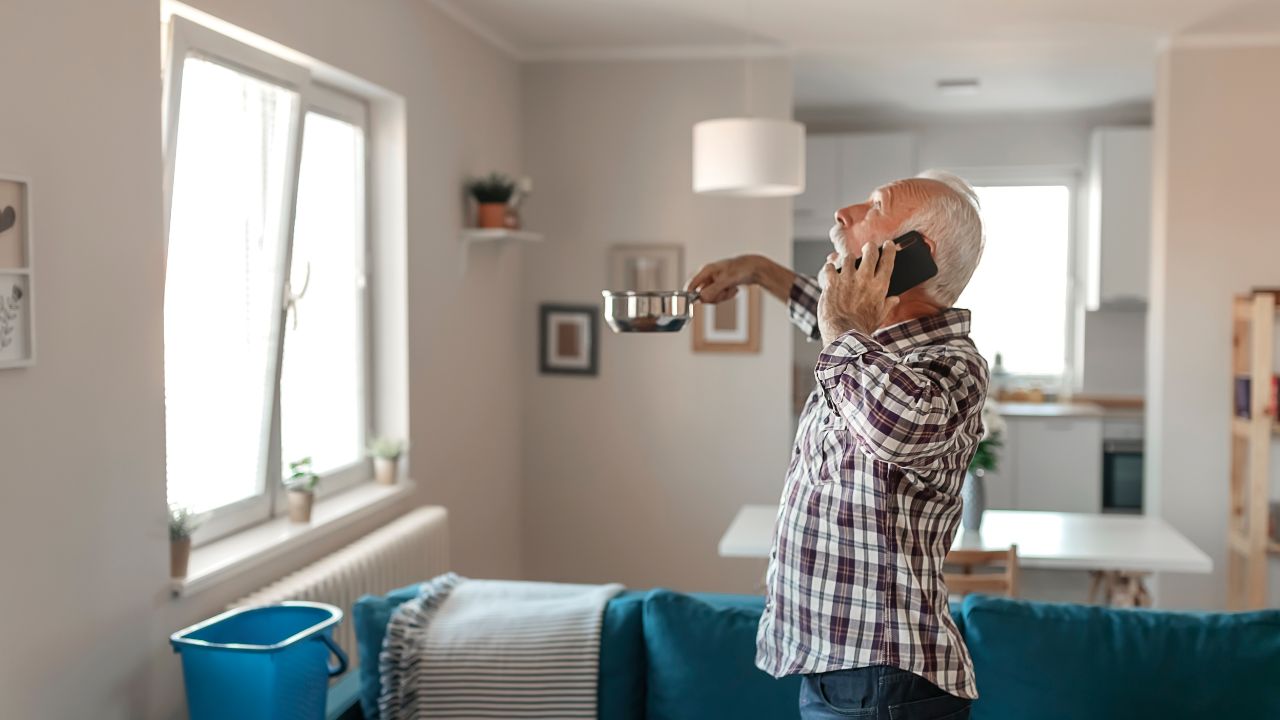
Rain shouldn't be a homeowner's nightmare, yet water damage and freezing accounted for 22.6% of all insurance claims between 2019 and 2023, with average claims costing $15,400. Most leaks stem from predictable failure points, improper flashing, clogged gutters, and negative grading that could be prevented with basic knowledge and routine maintenance. As extreme weather events increase 2.5x over historical averages, understanding the causes of house leaks and how to fix them isn't just helpful, it's essential. This comprehensive guide delivers actionable house leaking solutions backed by building science, engineering standards, and real-world data to help you diagnose, repair, and prevent rain-related leaks before they destroy your home's value and structural integrity.

Rain-related leaks damage homes and drain wallets. Water damage and freezing accounted for 22.6% of all home insurance claims between 2019 and 2023. Most leaks stem from predictable failure points in your building envelope: roofs, gutters, windows, and foundation grading. Understanding these common water intrusion causes and their quick fixes can save you thousands in damage.

What Are The Primary Causes Of House Leaks When It Rains?

House leaks during rain trace back to six primary failure points. Each represents a breakdown in your home's water-shedding system, from the roof down to the foundation grade.

Roof Issues

U.S. roof repair and replacement costs reached nearly $31 billion in 2024, a 30% increase since 2022. Damage to the roof covering is the most frequent source of hurricane-related insurance claims not related to storm surge. The roof fails through missing or damaged shingles, aging materials that crack and curl, and, most critically, broken flashing. Industry estimates suggest 60% to 90% of all roof leaks originate at flashing points such as chimneys, valleys, and roof-to-wall intersections. 

Improper flashing installation that violates the shingle-fashion lapping principle directs water into wall assemblies instead of away from them.

Clogged Gutters

Gutters should be cleaned at least twice a year to prevent:

  • Water overflow concentrates against the fascia, soffit, and foundation
  • Wood rot in fascia and soffit
  • Ice dams in colder climates
  • Foundation erosion and water pooling
  • Saturated soil increases the hydrostatic pressure on the basement walls

Faulty Window And Door Seals

Up to 76% of building envelope failures occur where fenestration meets the wall system. The cost to repair a single leaking window can range from $1,000 to $15,000, depending on the extent of hidden structural damage. Common failure modes include:

  • Broken or worn window seals are allowing water infiltration
  • Missing or clogged weep holes trapping water inside frames
  • Door frame issues and gaps
  • Failed caulking and sealants (limited lifespan, UV degradation)
  • Improper installation violates shingle-fashion lapping
  • Missing sill pan flashing with proper back dams and end dams

Exterior Wall Damage

All exterior claddings are expected to allow some water penetration during wind-driven rain events; the underlying Water-Resistive Barrier (WRB) is designed to manage this water. Problems arise when cracked walls, damaged siding, and gaps in caulking create openings that overwhelm the WRB. Cracked stucco and missing drainage planes allow water to bypass the protection system entirely, saturating wall cavities and causing extensive hidden damage.

Attic Ventilation

Poor attic ventilation traps moisture and heat, degrading roof materials from below. Inadequate airflow allows condensation to form on roof sheathing during temperature swings, mimicking leak symptoms and accelerating structural rot. Proper ventilation maintains roof system performance and extends material lifespan.

Foundation And Grading Issues

An estimated 98% of basements in the U.S. will experience water damage at some point. The 2021 IRC Section R401.3 mandates a minimum slope of 6 inches within the first 10 feet (5% grade) away from the foundation. When grading slopes toward the house or remains flat, water pools against foundation walls, saturates backfill soil, and forces its way through cracks via hydrostatic pressure. 

This single issue, negative grading, is the root cause of most basement water problems and often requires professional drainage system solutions.

How Can You Quickly Identify The Source Of A Roof Leak?

Pinpointing leak sources requires systematic inspection from the interior to the exterior. Start where water appears, then trace back to entry points. Leaks often travel along framing before appearing on ceilings or walls.

Signs Of Roof Leaks

  • Water stains on ceilings near the ridge, valleys, or chimney
  • Damp or wet insulation in the attic
  • Missing or damaged shingles
  • Visible gaps or cracks in flashing
  • Peeling paint on interior walls or ceilings
  • Efflorescence (white mineral deposits) on foundation walls
  • Rotted siding or fascia
  • Rust stains on adjacent walls

Roof Inspection Process

  1. Start with visual inspection of interior (attic, ceilings, walls)
  2. Examine the roof exterior for obvious damage
  3. Check all flashing points: chimneys, valleys, roof-to-wall intersections
  4. Inspect gutters for clogs and proper drainage
  5. Look for concentrated water flow patterns

Tools For Roof Inspections

  • Visual Inspection: Free (ladder, flashlight, safety gear)
  • Moisture Meter (Pin-Type): $50-$300 - Detects moisture in wood/drywall at 5-30mm depth
  • Moisture Meter (Pinless): $100-$500 - Scans large areas quickly up to 10mm depth
  • Infrared Thermography Camera: $300-$5,000 - Detects hidden moisture via temperature differentials
  • Endoscopic Camera: $100-$1,000 - Inspects hidden areas without demolition
  • Tarp and roofing cement for temporary fixes

When To Call A Professional

Professional diagnosis is critical when the leak source isn't obvious, structural integrity may be compromised, or proper diagnosis requires specialized testing. The average cost for professional foundation repair ranges from $2,200 to $8,100. Professional ASTM E2128 water test service costs $500-$2,000, while ASTM E1105 window penetration testing runs $800-$3,000. Improper DIY repairs often worsen problems; professionals prevent expensive mistakes. After major weather events, consider a professional storm damage assessment to identify hidden issues before they escalate.

What Are The Fastest Temporary Fixes For Roof Leaks?

Temporary fixes buy time for proper repair but aren't permanent solutions. These emergency measures typically last 30-90 days before requiring replacement or professional repair.

Tarp Usage

PROS:

  • Quick installation
  • Inexpensive
  • Protects large areas
  • Readily available

CONS:

  • Not weatherproof long-term
  • Can blow off in the wind
  • May cause additional damage if not secured properly

COST: Emergency tarp - included in initial mitigation (typically under $100 for materials)

Roof Sealants

Sealant TypeMaterialsApplication MethodEffectivenessTypical Cost
Roofing CementAsphalt-basedTrowel or caulking gunGood for small cracks/gaps$5-$20 per tube
Flashing CementPlastic cementDirect application to cracksTemporary flashing repair$10-$25 per tube
Temporary SealantPolyurethane/SiliconeCaulking gunMinor gaps around penetrations$8-$15 per tube

DIY Roof Patch

  1. Clean and dry the damaged area thoroughly
  2. Apply roofing cement to small cracks or holes
  3. Cut a patch of material (roofing fabric or metal) larger than the damaged area
  4. Press the patch firmly into the roofing cement
  5. Apply an additional cement layer over the patch edges
  6. Smooth and feather edges to prevent water pooling
  7. Allow to cure per manufacturer instructions (typically 24-48 hours)

What Are The Best Long-Term Solutions For Preventing Roof Leaks?

Long-term repairs address root causes through structural work: replacing faulty flashing, re-roofing, and installing proper drainage systems. Prevention beats reaction; routine inspections catch problems before they escalate into costly repairs.

Regular Roof Inspections

Inspect roofs annually and after major storms to identify damage early. Professional inspections detect subtle failures like improper flashing installation, aging materials approaching end-of-life, and developing weak points at penetrations. Early detection prevents minor issues from becoming major structural problems. 

Proper diagnosis ensures repairs target the actual source rather than symptoms. Comprehensive roof leak prevention starts with consistent monitoring and maintenance schedules.

Roof Ventilation

Ventilation TypeFunctionBenefitsTypical Cost
Ridge VentsContinuous vent along roof peakEven air distribution, no moving partsIncluded in re-roofing
Soffit VentsIntake vents under eavesProvides intake air for system$3-$10 per vent
Turbine VentsWind-powered exhaustActive ventilation, no electricity$50-$150 each
Gable VentsEnd wall ventilationCross-ventilation$25-$100 each

Gutter Maintenance

Gutter guards installation costs $1,000-$2,500. Professional gutter re-sloping and sizing runs $100-$2,500.

  • Clean gutters at least twice per year (spring and fall)
  • Inspect and clear downspouts regularly
  • Ensure proper slope (minimum toward downspouts)
  • Install permanent downspout extensions (10+ feet from foundation)
  • Consider professional sizing for adequate capacity
  • Verify kickout flashing at roof-to-wall intersections

How Do Leaks Around Windows And Doors Happen?

Up to 76% of building-envelope failures occur where windows/doors meet the wall. Most leaks come from installation or sealing failures, not bad windows or doors.

Common Causes

Broken or aging window seals

  • Fog/condensation between panes
  • Water is entering through failed perimeter seals
  • Reduced insulation performance
  • UV-worn sealants
  • Joint movement that pulls seals apart

Improperly installed doors
Flashing must be installed in shingle fashion (upper layers overlap lower). Mistakes send water into wall cavities, such as:

  • Missing sill pan flashing
  • Poor frame installation or gaps at the rough opening
  • Missing/inadequate weatherstripping
  • Failed threshold seal
  • Reverse-lapped flashing (major error)
  • Missing back dam or end dams on the sill pan

How To Improve Seals

  • Check perimeter caulking for cracks/gaps
  • Clear weep holes at the bottom of exterior frames
  • Remove failed caulk completely and clean surfaces
  • Re-seal with quality polyurethane or 100% silicone; tool for a water-shedding bead
  • Replace worn door weatherstripping
  • Confirm that the head flashing extends past the opening and includes a drip edge

Professional Flashing Repair

Repairs typically cost $1,000–$15,000 per window, depending on hidden damage. Proper repair usually requires removing the window and surrounding siding to rebuild an integrated, correctly sequenced flashing system, why correct installation matters most.

How Do Exterior Wall Problems Contribute To Leaks?

All exterior claddings are expected to allow some water penetration during wind-driven rain. The Water-Resistive Barrier behind the cladding manages this water, but only if cladding damage doesn't overwhelm the system.

Cracked Walls

Wall cracks create direct pathways bypassing the drainage plane:

  • Foundation settling is creating vertical cracks
  • Weather damage (freeze-thaw cycles)
  • Aging materials lose elasticity
  • Impact damage to siding or stucco
  • Cracks bypass the drainage plane and allow direct water entry into the wall cavity

Caulking Failure

Signs of Failed Caulking:

  • Visible cracks or gaps in sealant joints
  • Peeling or pulling away from the substrate
  • Hardened, brittle texture
  • Discoloration or UV damage
  • Water stains below joints

Repair Steps:

  1. Remove all old caulking completely using a utility knife or a removal tool
  2. Clean joint surfaces with an appropriate cleaner
  3. Allow surfaces to dry thoroughly
  4. Apply backer rod for joints deeper than 1/4 inch
  5. Select appropriate sealant (polyurethane for most applications)
  6. Apply sealant in a continuous bead
  7. Tool to proper concave profile
  8. Allow full cure time before exposure to water

Other Causes Of Wall Leaks

Significant gaps in siding or failed sealant joints can overwhelm the Water-Resistive Barrier. Damaged vinyl or wood siding creates direct entry points for water. Impervious surfaces like concrete patios and pool decks adjacent to walls can also channel water toward foundations if not properly sloped. Materials that manage heat and water drainage effectively help protect the building envelope. Improper or missing flashing around exterior wall penetrations, pipes, vents, and electrical boxes allows water infiltration. 

Failed step flashing at roof-to-wall intersections, especially when not properly interwoven with shingle courses, directs concentrated water flows into wall assemblies. Missing kickout flashing at the bottom of roof-wall intersections is particularly damaging, funneling gallons of roof runoff directly against wall surfaces during every rain event.

What Are The Immediate Steps To Take If Your House Is Leaking During A Storm?

Active leaks demand immediate action to minimize damage. The average water damage claim costs $15,400, but a quick response can significantly reduce losses. Up to $25,000 in damage can result from just 1 inch of water in a typical home.

Minimizing Water Damage

One in 67 insured homeowners filed a water damage or freezing claim annually between 2019 and 2023. Take these immediate steps:

  • Place buckets or containers under active leaks
  • Move furniture and valuables away from affected areas
  • Cover items with plastic sheeting
  • Use towels to absorb water on floors
  • Document damage with photos for insurance
  • Turn off electricity in affected areas if safe to do so
  • Pump out standing water if there is a significant accumulation

Using A Tarp Or Plastic Sheeting

FeatureTarpPlastic Sheeting
DurabilityHeavy-duty, puncture-resistantThinner, tears more easily
Water Resistance100% waterproofWaterproof but less robust
Wind ResistanceBetter when properly securedCan blow away more easily
Ease of InstallationRequires securing to structureLighter, easier to handle
Cost$20-$100 depending on size$10-$30 per roll
Best UseRoof coverage, extended protectionInterior protection, furniture covering
Typical DurationSeveral weeks if properly securedDays to weeks maximum

Drying Your Home

  • Remove standing water with a pump, wet vacuum, or mop
  • Remove wet insulation from the attic or walls if accessible
  • Set up fans to promote air circulation in affected areas
  • Deploy dehumidifiers to remove moisture from air (target <50% humidity)
  • Open windows when the outdoor humidity is lower than the indoor humidity
  • Remove wet carpets or padding that cannot be dried within 48 hours
  • Monitor moisture levels with a meter to confirm drying progress
  • Inspect for mold growth after 48-72 hours

Should You Repair Leaks Yourself Or Hire A Professional?

Some fixes are DIY-friendly, but others need pros—bad repairs can worsen leaks and void warranties. Don’t risk a ladder job if you’re unsure.

DIY-Friendly Tasks

  • Clean gutters
  • Clear window weep holes (unless removal is needed)
  • Re-caulk windows/doors (minor gaps only)
  • Install downspout extensions
  • Small roof patches only when the source is obvious and the roof is low/accessible

Why DIY Can Backfire

  • Incorrect flashing or materials can create hidden damage and new leak paths
  • Falls are a major home-injury risk
  • You can miss structural issues or code requirements
  • Roofing mistakes may void manufacturer warranties
  • Structural foundation cracks (e.g., > 1/8" or shifting) aren’t DIY territory

Hire A Pro For These

  • Flashing repair/replacement
  • Window/door flashing or re-installation
  • Exterior foundation waterproofing
  • French drains (needs correct slope, depth, discharge)
  • Roof replacement

Choosing A Contractor

  • Verify license + liability/workers’ comp insurance
  • Get at least 3 detailed, same-scope estimates
  • Check reviews/references, confirm permits if needed
  • Ask about labor + material warranties and timeline
  • Avoid large upfront deposits (over ~25%); use milestone-based payments

Professional Leak Inspections

When the source isn’t clear, testing is worth it. Common options include controlled water tests ($500–$2,000), window penetration tests ($800–$3,000), and blower door tests ($300–$600), often paired with tools like moisture meters and infrared imaging for accurate diagnosis before costly repairs.

What Are The Long-Term Consequences Of Ignoring Leaks In Your Home?

Ignoring leaks turns small repairs into major replacements—damage spreads, materials weaken, and costs rise fast.

Roof Damage Over Time

  • U.S. roof-claim costs topped $30B in 2024.
  • Ongoing moisture can weaken rafters, warp/sag roof decking, ruin insulation performance, and accelerate shingle failure—often turning a repair into a full roof replacement.

Mold And Mildew Growth

  • About 14,000 water-damage incidents happen daily in the U.S.
  • Mold can start in 24–48 hours, triggering respiratory/allergy issues and damaging drywall, wood, and flooring. Severe cases (including toxic species like Stachybotrys) may require $500–$6,000+ remediation and can spread through HVAC.

Home Value Impact

  • 98% of basements will experience water damage at some point; average claims ran $15,400 (2019–2023).
  • Water history can derail inspections, force price cuts, raise premiums, and reduce buyer interest—especially with visible staining or mold.

Climate Change Impact

  • 27 separate billion-dollar U.S. disasters occurred in 2024 ($182.7B total), and the 2020–2024 average is 2.5× higher than historical norms.
  • More frequent extreme rainfall overwhelms drainage and repeatedly stresses the building envelope—compounding damage when storms hit before repairs can be made.

How To Protect Your Home From Future Leaks

Prevention beats reaction every time. Regular maintenance, cleaning gutters twice yearly, and scheduling annual roof inspections catch problems before they escalate into structural damage. The foundation of leak prevention is proper landscape grading: maintain a minimum 5% grade away from your foundation, extend downspouts at least 10 feet from the house, and ensure water flows away from the structure at every point.

Know the basics: water should always be lapped and layered to shed outward, and systems like siding and windows must manage and resist wind-driven rain. If the source isn’t obvious, or damage suggests a bigger issue, bring in a professional. A $500–$3,000 diagnosis is small compared to the hidden damage that grows over time.

With heavier storms becoming more common, resilient building details matter more than ever. Fix small leaks fast, document repairs with photos, and keep maintenance records for insurance and resale.

Need professional drainage solutions to protect your foundation? Request a free quote from Signature Landscape to ensure proper grading and drainage around your home.

Signature Landscape
Moe has remained committed to excellence in both design and customer service ever since day one. Today, seeing clients from many years back who are still enthusiastic and appreciative fuels his fire. Knowing he has such a positive effect on his clients and the beauty of the city he lives in drives Moe daily to strive for excellence.

Schedule A Consultation

Interested in transforming your outdoor space into a lush oasis? Fill out the form below to schedule a consultation with our Hardscaping & Landscaping Experts and bring your vision to life!

  • This field is for validation purposes and should be left unchanged.
  • Please be as descriptive as possible to allow us to better provide a quote for your project.
  • Accepted file types: jpg, jpeg, gif, png, Max. file size: 50 MB.
Signature Landscape Logo
Signature Landscape
We create exceptional exterior living spaces and are passionate about the quality and beauty reflected in every Signature Landscape design.
Contractors License: 583113
Quicklinks
Get In Touch
Working Hours:
Daily: 9:00 AM – 6:00 PM
Houzz
© 2026 Signature Landscape. All Rights Reserved.